jueves, 2 de febrero de 2023

Lighting Workshop Module #4

The Lighting challenge that I choose for this assignment was the challenge 1, have majority of the image to be in shadows and use the light to focus attention at an area.

Used the 'Fantasy Cave Environment Set' from Unreal Marketplace. For the already made environment, I deleted the lighting setup it had and started by setting the camera. By eliminating the closed top of the environment allowed me to get sun light from the top of the cave.

I converted all the mesh asset to nanite and that really helped with faster work on the project without any issues. 

For the scene I set a directional light, that is my main light, pointing to the cave ruins entrance which is my focus point. For additional coloring I added some orange point lights at the bottom of the cave as if it where a volcano area. Then to separate even more the foreground and background I added a volumetric fog that also gave me some 'god rays' on my main directional light.

As an extra, put a SkyAtmosphere that elevated more the environment fog. By setting its environment scattering color to blue separated even more the characters silhouette on the bridge.

UE5.1 render with SkyAtmosphere

UE5.1 render without SkyAtmosphere


viernes, 27 de enero de 2023

Lighting Workshop Module #3

For the custom material I went with a wood floor tile and bloody walls.

I used a wood textures from https://polyhaven.com/textures and added other grunge textures from https://www.textures.com/library played with the multiply, add, lerp and cheap contrast to get the desired look.

Wood Material

UE5 Wood Material


Roughness Nodes

For the blood material I took a leaking png texture and modified if and created a normal texture for it. Then created a decal material in UE to add to the walls.


Blood texture

Blood Material Nodes

Blood Decal Material


For the scene I took the idea of a hallway to show the floor and wall blood textures with a light coming from the back.

Reference Images

With a Mixamo character model as my monster, I put a back light to it to for the silhouette and showing the shadows on the floor.

UE5 Lumen

UE5 Lumen

UE5 close shot of blood material

UE5 close up of wood material


viernes, 20 de enero de 2023

Lighting Workshop Module #2

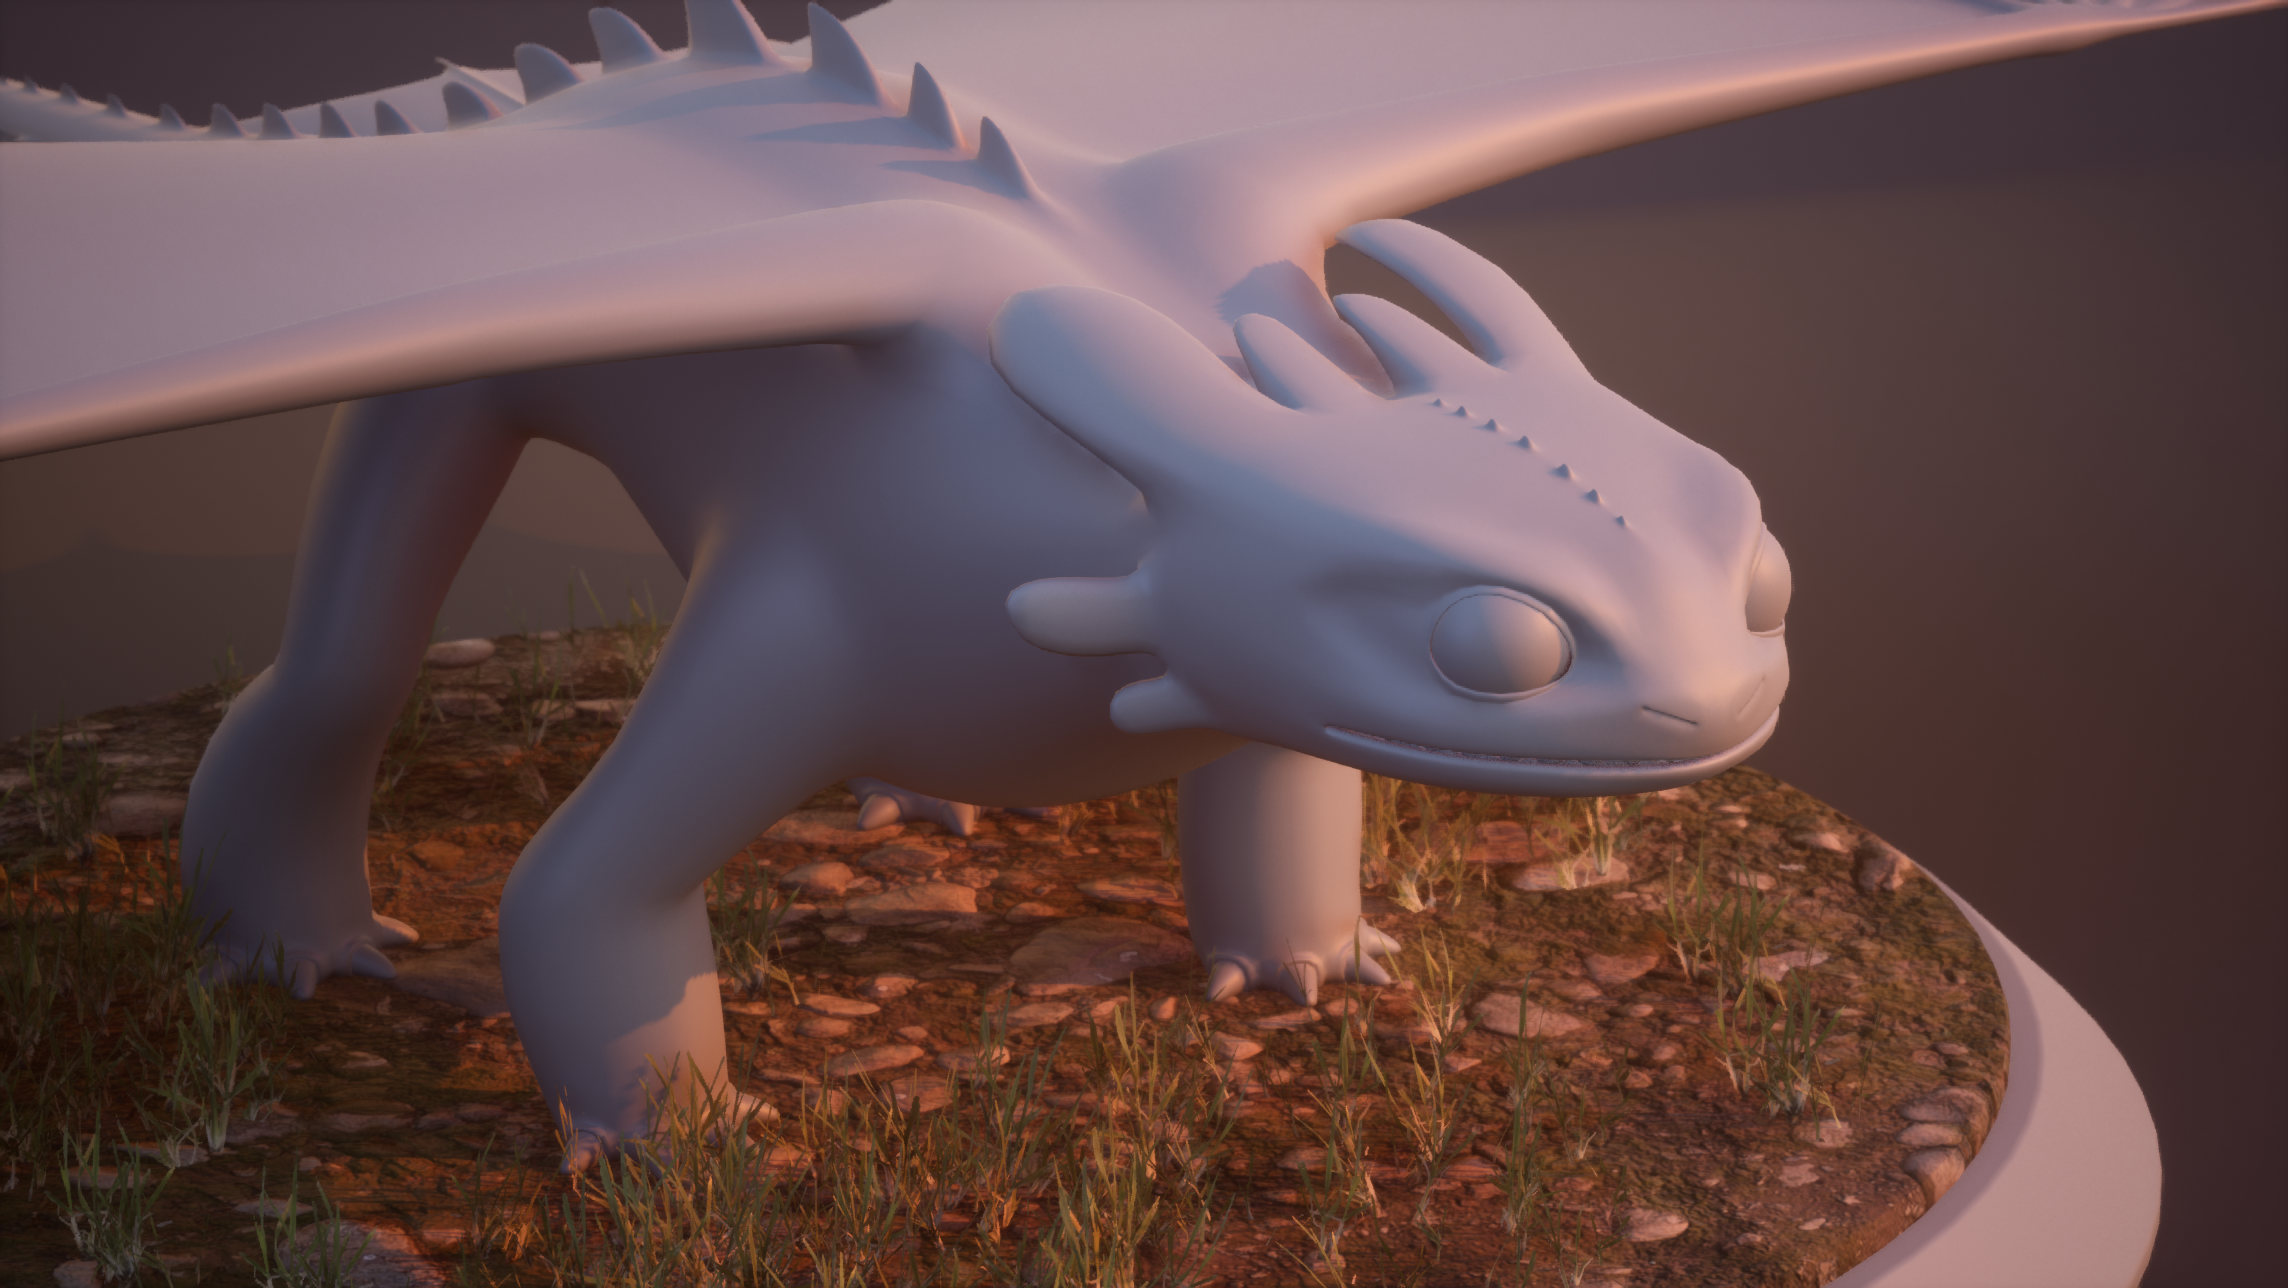
For this assignment I used an older model that I made of toothless and tried to recreate the first scene in the movie where both characters interact. I used colors tones of oranges, pinks and blues to recreate the dusk feel with more warmer colors. Also used as a base lighting setting the HDRI in the SkyLight with similar tones of what I was going for to have a starting color and work on add other lights to reinforce the look. I use a DirectionalLight for the orange sun color and also to get the shadows, and then three RectLights of blue, pink and yellow to pop out more the model.

Reference shot of How to Train your Dragon

Render in UE5.1 (full shot with material spheres)

Render in UE5.1 (full shot)

Render in UE5.1 (close up)

Render in UE5.1 (close up with depth of field)

jueves, 12 de enero de 2023

Lighting Workshop Module #1

 First I created a moodboard of what I was going to for in the lighting assignment. The model I choose has a very dynamic pose that just seemed dramatic but mysterious and so I choose a lot of darker scenes reference, using neon light and the color green to give a more disturbing look.


I did a medium shot and a full shot of the model. My main light is located in angle at the top of the model for a more dramatic look. My only concern is that I may have made it to strong in comparison to the rest, this is seen even more in the RGB shot. 

My rim light is is a bright red color to the right side of the model to separate that side that is where the hand is and my main focus.

Medium shot - Arnold render

Full shot - Arnold render

Medium shot RGB - Arnold render

Full shot RGB - Arnold render


    Three point light positions


jueves, 1 de diciembre de 2022

Week 15 VR Interactive Characters (Final Pass)

 For this week was all about polishing the project and so I dedicated to work with my teammate on the blueprints an getting the interactions just right.


I readjusted the state machine since it was causing no face to just make the open mouth animation one time and you needed to get out of his trigger box to like restart it. This was fixed adjusting the collision boxes that were intersecting and also making the animation state machine be a cycle from been aware to opening his mouth if you pick up a token, from here been able to activate if you are in his interactive box area (closest to him) and been able to go back to opening his mouth if you have a token in hand.


Set up the awesome Niagara system that teammate made and this also activates the sound effect of no face once you are close to the location of his interaction trigger box (closest to him).

jueves, 24 de noviembre de 2022

Stylized VFX in RIME

UnrealFest 2018 talk about the stylized effects from the game RIME.

Video link: https://youtu.be/4FIDBeF_4SI

Week 13 VR Interactive Characters (Clean Pass)

This week I dedicated myself to fixing the toon shader since several suggestions and criticisms were given in the last revision.

One of the things mentioned was that there was a jittering effect and I found that this can be fixed by checking the Blendable Location to Before Tonemapping option. This, while a bit more expensive, prevents ghosting of the lines while the view is moving.


The second thing was to work on being able to recreate the look of the movie scene based on the reference of the image. For this I did the water.

Spirited Away Ref


Unreal Engine view

The water was more complicated than I thought and it was the result of several tutorials I found. While searching I came across this technical talk by Simon Schreibt about water in RIME that I found super interesting for the stylized look and I think is a great help to understand how to create these texture effects. I totally recommend it.


Final Delivery

 For final delivery I was mainly polishing up the VFX and adjusting the times to fit the final animation. One of the first fix was changing ...